Introduction
Homebrew is a free macOS package manager that allows you to install, update, or remove software by running commands in the terminal. Use Homebrew to easily install the latest versions of various developer tools for macOS, such as PostgreSQL, Python, PHP, Nginx, etc.
In this tutorial, you will learn to install and use Homebrew on macOS.
Prerequisites
- A computer running macOS Catalina or higher (no official support for older versions, but they may also work)
- Administrator privileges
How To Install Homebrew on Mac?
Follow the steps below to download and execute Homebrew installation script on your Mac.
Install Xcode Command Line Tools
Xcode is an integrated development environment for macOS, and it contains tools that Homebrew needs to function properly.
Note: Xcode is often a prerequisite for installing and using various tools, such as PuTTY, a telnet and SSH client on Mac.
Since you don't need the entire 10GB Xcode package from the App Store, install only the Xcode command line tools.
Follow these steps:
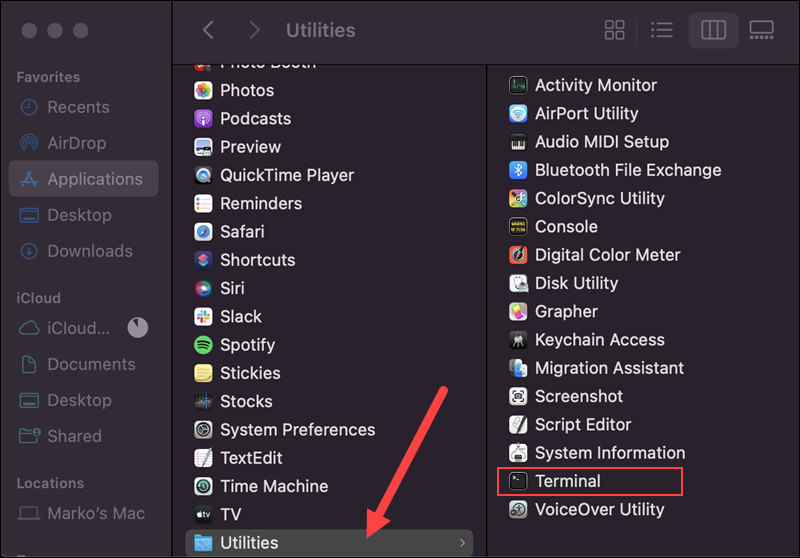
1. From the Finder, select Go and click Utilities to display all the utilities.
2. Locate and launch the Terminal app.
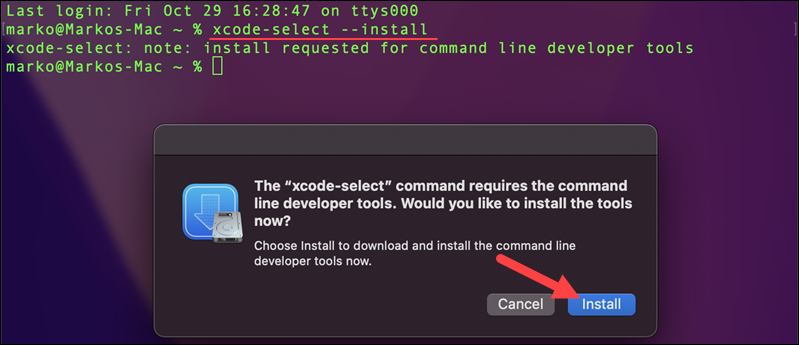
3. In the terminal, run the following command to install Xcode command line tools:
xcode-select --installNote: Check out this article for a comprehensive list of Mac terminal commands alongside a downloadable PDF cheat sheet for easy reference.
4. Click Install when prompted to proceed with the installation.
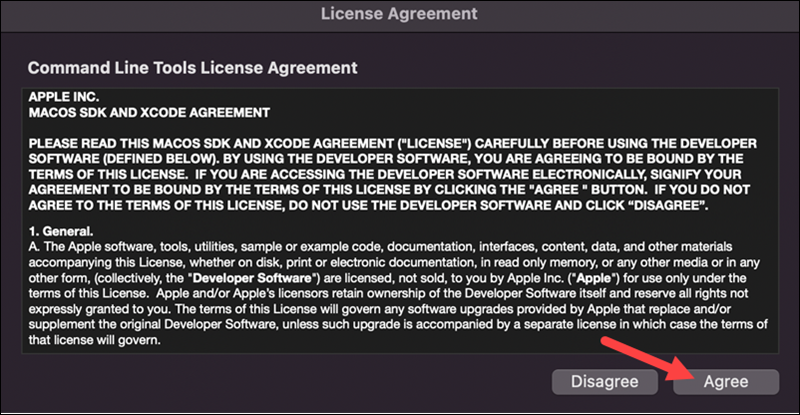
5. The script displays the Xcode License Agreement. If you agree to the terms, click Agree and wait for the installation to finish.
Install Homebrew
After installing Xcode command-line tools, follow the steps below to install Homebrew.
1. Download the installation script:
- Users running macOS High Sierra, Sierra, El Capitan, or earlier, run:
/usr/bin/ruby -e "$(curl -fsSL https://raw.githubusercontent.com/Homebrew/install/master/install)"- Users running Catalina, Mojave, or Big Sur, run:
/bin/bash -c "$(curl -fsSL https://raw.githubusercontent.com/Homebrew/install/master/install.sh)"2. Enter your administrator password when prompted and press Return to continue. Wait for the download to finish.
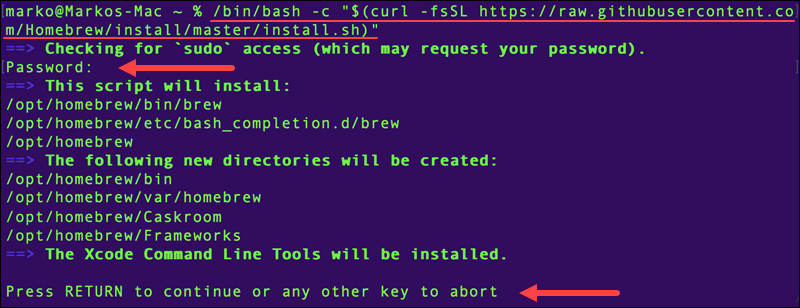
The installation script lets you know which changes it will make on your computer.
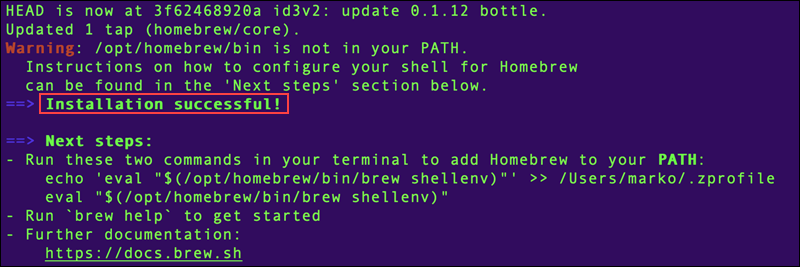
3. Press Return to install Homebrew. The installation may take a couple of minutes, so wait for the Installation successful message to appear.
Note: If you don't like Homebrew, you can try Pip, another package manager for Mac. See how to install Pip on Mac.
Turn Off Analytics
Homebrew collects some system information by default and sends it back to the developers. It collects the following:
- The Homebrew user agent.
- Google Analytics version.
- Homebrew analytics tracking ID and Homebrew analytics user ID.
- Events, e.g., Homebrew
installevent category.
Disable the analytic data collection by running:
brew analytics offAfter disabling analytics, you can check the analytic data collection status by running:
brew analytics
The output lets you know if the analytics are enabled or disabled.
Install, Update or Remove Packages
- Installing packages:
You can install packages using Homebrew using the following syntax:
brew install [package name]For example, to install the tree command to enable a graphical representation of a directory tree, enter:
brew install tree
The command updates the Homebrew package list and installs the tree command.
- Updating packages:
You should regularly update the packages installed via Homebrew, as well as the package manager, to ensure you always have the latest features.
To see a list of packages that need updating, run the following command:
brew outdatedUse the following syntax to update a specific package:
brew update [package name]To check if you have the latest Homebrew version, run this command:
brew update
Since we have a fresh Homebrew installation, the output shows everything is up to date.
- Removing packages:
Warning: Sometimes, there are dependencies between the software you want to uninstall and the software you are still using. Verify by using the following syntax:
brew deps [package name]To uninstall a package regardless of software dependencies, use the following syntax:
brew uninstall --ignore-dependencies [package name]If you no longer need certain software that you previously installed via Homebrew, remove it from your system with the following syntax:
brew uninstall [package name]
In the example above, we uninstalled the tree package.
How to Uninstall Homebrew
To uninstall Homebrew from your system, follow the steps below:
1. Run the following command:
- On macOS Catalina, Big Sur, and Mojave:
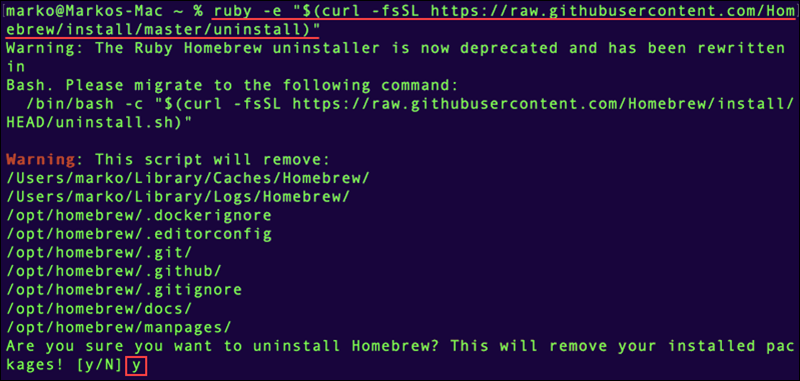
/bin/bash -c "$(curl -fsSL https://raw.githubusercontent.com/Homebrew/install/HEAD/uninstall.sh)"- On macOS High Sierra, Sierra, El Capitan, or earlier:
ruby -e "$(curl -fsSL https://raw.githubusercontent.com/Homebrew/install/master/uninstall)"2. The system notifies you which Homebrew files it will remove and asks for confirmation. Type y and press Return to uninstall Homebrew from your system.
Conclusion
After following the steps in this tutorial, you should have Homebrew installed on your system. The benefits of using Homebrew are numerous. It holds a variety of software packages in one place, offers thousands of command-line-based tools, as well as many apps that aren't available in the App Store.
For the Linux tutorial, read How to Install Homebrew in Linux.
