Introduction
MySQL is a well-known, open-source database application. Its high performance, ease of use, and data security make it one of the best database software options.
An essential process in any relational database, including MySQL, is creating tables to store and organize data.
This guide shows how to create a table in MySQL using MySQL CLI and Workbench.
Prerequisites
- Access to a terminal window/command line.
- A MySQL user account with root or admin privileges.
- (Optional) MySQL Workbench installed (see our guide for installing MySQL Workbench on Ubuntu).
Create a Table via CREATE TABLE Statement
The CREATE TABLE statement is a flexible and straightforward way to make a new database table. The method defines the table schema, including column names, data types, and constraints.
To create a table, see the following example syntax:
 CREATE TABLE [IF NOT EXISTS] [table_name](
    [column_name_1] [data_type] [constraints],
    [column_name_2] [data_type] [constraints],
    ...
    [column_name_n] [data_type] [constraints],
    [PRIMARY KEY(column_name)]
) [table_options];
The template contains the following elements:
CREATE TABLE. The statement to create a table.IF NOT EXISTS. An optional check that prevents an error if a table with the same name already exists. The exact table parameters are not checked and can be identical to another database table.[table_name]. Table name that can also be in the format`[database_name]`.`[table_name]`.[column_name]. The table column names.[data_type]. The specific data type allowed for the column.[constraints]. Optional column constraints and conditions.PRIMARY KEY(column_name). The primary key declaration, if any.[table_options]. Additional options that apply to the whole table, such as the storage engine, character set, etc.
Substitute the placeholders to make a custom MySQL statement for table creation. The exact parameters depend on the application requirements.
Follow the steps below to create an example table using the CREATE TABLE statement.
Step 1: Launch MySQL CLI and Log In
To access the MySQL client and connect to a database, do the following:
1. Open the terminal or command prompt.
2. Enter the following MySQL command to log in:
mysql -u [username] -p
Replace [username] with the actual MySQL username, or log in as root.
Note: If you received a MySQL ‘Command Not Found’ error when trying to log into the MySQL CLI, see how to fix the MySQL ‘Command Not Found’ error.
3. When prompted, enter the user's password and press Enter.
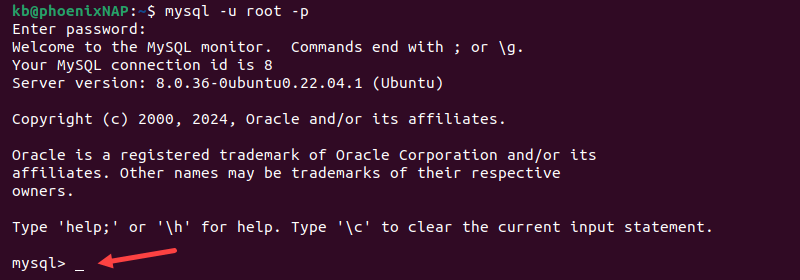
The prompt changes to the MySQL CLI, indicating the login was successful.
Note: If you have a new MySQL installation, you may experience an error while attempting to log in for the first time with the root user. See how to fix "Access denied for user root@localhost" MySQL error for more details.
Step 2: Create a New Database or Use an Existing Database
To create a new database or use an existing one, follow the steps below:
1. If using an existing database, skip this step. Otherwise, to create a new database, run the CREATE DATABASE statement and provide the database name:
CREATE DATABASE [database_name];For example:
CREATE DATABASE company;

Replace [database_name] with the actual name.
2. Verify the database was created successfully. List all databases with:
SHOW DATABASES;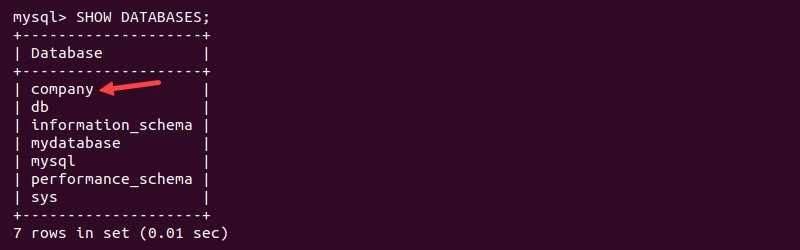
The output shows all databases on the server in a table format. Locate the newly created database or find an existing one on the list.
3. To use a database, switch to it with the USE statement and provide the name. For example:
USE [database_name];
Replace [database_name] with the real database name. The command's output confirms the database change.
Step 3: Create a Table
After creating or selecting a database, proceed to create a MySQL table. For example, to create a table named "employee" with two columns: "id" and "name", run the following statement:
CREATE TABLE employee (
    id INT AUTO_INCREMENT,
    name VARCHAR(50) NOT NULL,
    PRIMARY KEY(id)
) ENGINE=InnoDB;
The example has the following:
employee. The table name.id. The column stores an employee's ID. The data type is integer (INT), which automatically increments (AUTO_INCREMENT) when new values are inserted into the table.name. The column contains an employee's name. The data type is variable characters (VARCHAR) with a maximum length of 50. The column cannot be left blank (NOT NULL).PRIMARY KEY(id). Sets theidcolumn as the table's primary key.ENGINE=InnoDB. Specifies the storage engine asInnoDB.
Note: See the key differences between two main storage engines: MyISAM vs. InnoDB.
Confirm the table is created with the DESCRIBE statement:
DESCRIBE employee;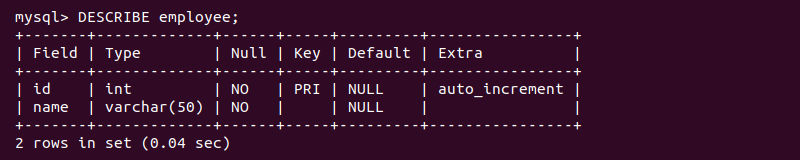
The command prints the table details. Next, insert data, or drop the table and create a new one.
Create a Table Using MySQL Workbench
MySQL Workbench provides a visual interface for managing databases and creating tables. Follow the steps below to create a table using MySQL Workbench.
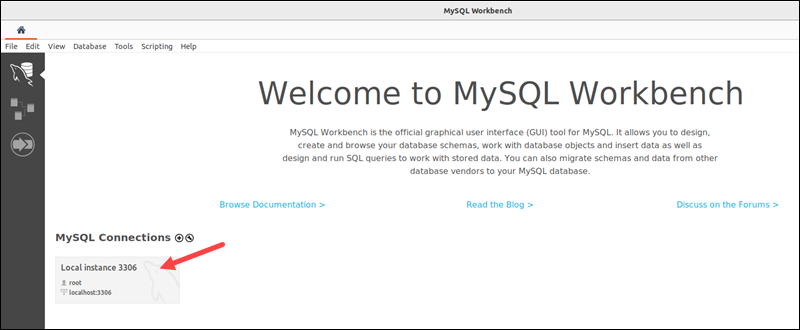
Step 1: Open MySQL Workbench and Connect to Server
Establish a connection to the MySQL server:
1. Open the MySQL Workbench program via GUI. Alternatively, run the following command in the terminal:
mysql-workbench2. Choose an existing database connection from the list.
Alternatively, create a new database and establish a connection. For the exact steps, see our guide for connecting to a MySQL database.
3. A new window opens, asking for the user's password.
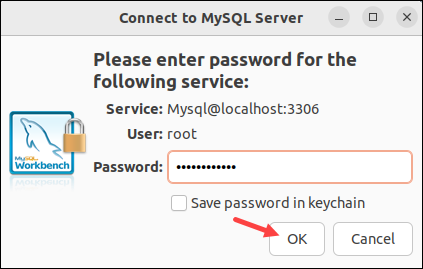
Enter the password and click OK to establish a connection.
Step 2: Select a Schema
After connecting to a database server, select a database schema. In the left menu, use the arrows to navigate to Schemas, then expand the schema in which you want to create a table.
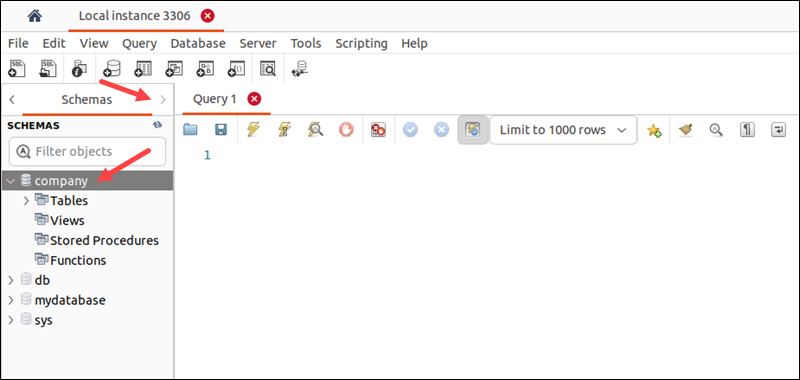
Alternatively, create a new schema. Follow our instructions to create a new database schema in Workbench.
Note: Workbench runs a CREATE SCHEMA statement, which is a synonym for CREATE DATABASE.
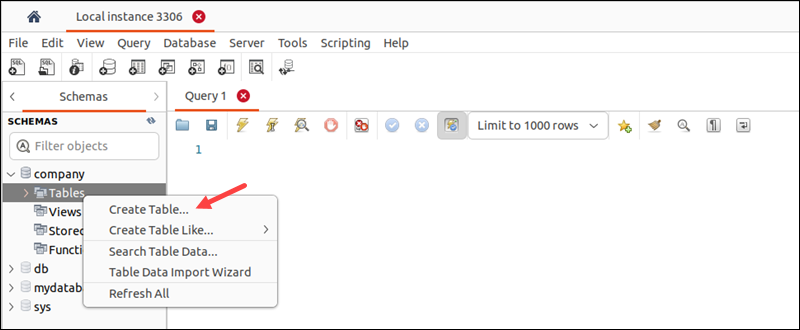
Step 3: Create a Table
To create a table, do the following:
1. Right-click Tables and choose Create Table.
3. Provide the table name.

4. Provide the column name, data type, and optional constraints.
5. Double-click the section under the table name to add new columns.

Add as many columns as required and fill out the data for each.
6. After adding all the required data, click Apply to generate a query that creates the table.
7. Review the query and click Apply again when ready.
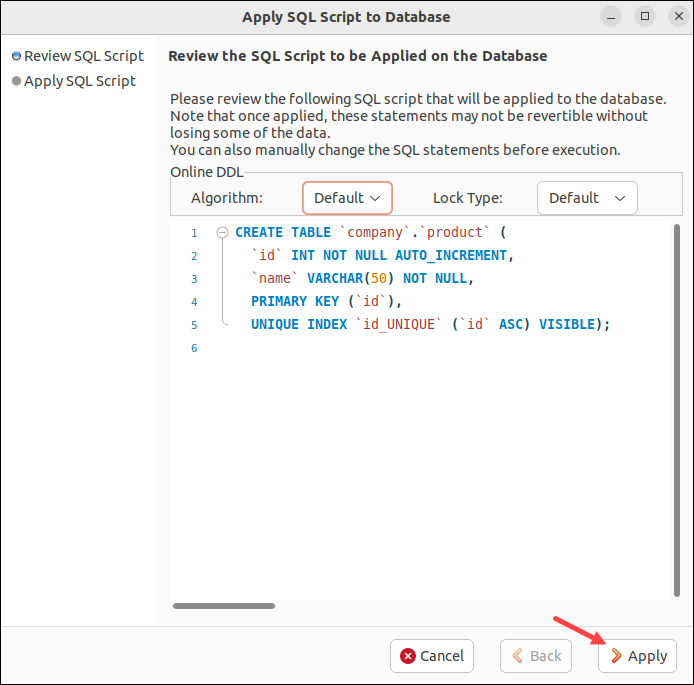
The script executes and creates the table in the database.
Conclusion
This guide showed two ways to connect to a MySQL database: through the MySQL CLI and Workbench. Use a method that best suits your environment setup and use case.
Next, learn how to check the MySQL database size.
